Table of Contents
1. Tent annex: evidence-based setup for extra living space and storage
2. Design and purpose of a tent annex
3. Sizing, dimensions, and setup for real campsites
4. Weatherproofing, attachment, and real-world setup
5. Tent annex FAQ
6. Conclusion and practical takeaways
Tent annex: evidence-based setup for extra living space and storage
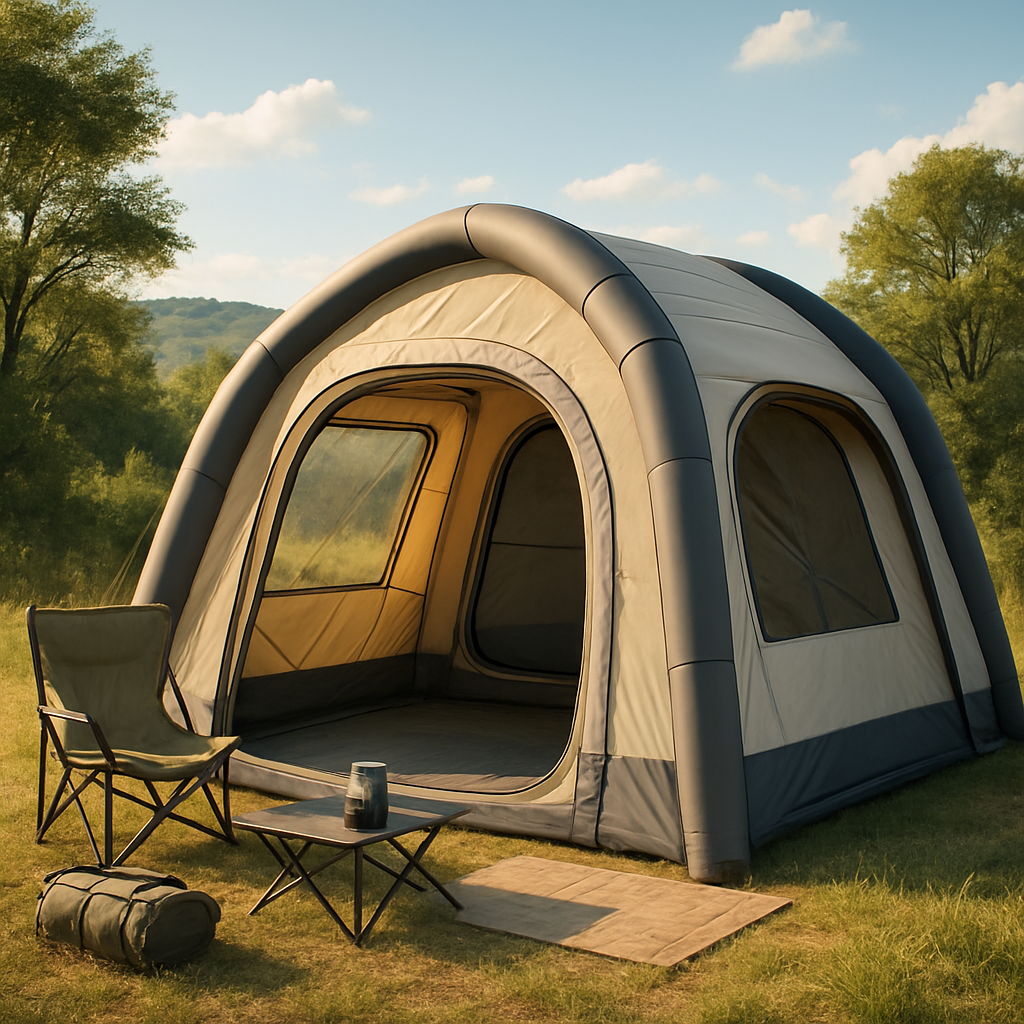
An attached or freestanding Tent annex adds usable living space and a sheltered zone without extending your tent’s footprint. For families, it keeps shoes, packs, and gear out of the sleeping area while offering a flexible room that can serve as a bedroom, living area, or storage hub depending on configuration. A well-chosen annex protects against wind and drizzle and helps maintain privacy between sleeping pods. With the right dimensions and mounting options, you can optimize flow from the main tent to the annex, setting the stage for practical camping. This framing lays the groundwork for the design and purpose of a tent annex.
What is a tent annex?
An attached or freestanding addition that connects to your main tent, creating extra interior space or a sheltered external area.
It can function as a bedroom, living room, or storage area depending on configuration.
Why add a tent annex to your campsite?
Increases living area, storage capacity, and weather protection.
Enhances privacy and organization for family or group camping.
Key terms: tent vestibule, tent extension, camping canopy
Tent vestibule typically at the tent entrance for sheltered entry.
Tent extension can refer to an attached room or canopy used to extend space.
Camping canopy offers shade and dry space adjacent to the tent.
Design and purpose of a tent annex
A tent annex provides a modular extension to your shelter setup, converting an external space into usable living area, storage, or a dedicated room for kids or gear. It can function as a standalone tent extension, a vestibule buffer, or a fully enclosed annex room that connects directly to the main tent. When you plan a tent annex, think about how you’ll live in it—weather protection, privacy, and ease of entry become part of the design.
Core components and layout
Common configurations include an attached room with a zip door and separate vestibule areas.
An attached annex room that links to the main tent via a zip doorway creates a seamless interior flow, while separate vestibules offer weatherproof entries for boots, backpacks, and cooking gear without pulling moisture into the sleeping area.
Durable fabrics with waterproof coatings and a tethered groundsheet improve stability.
Look for ripstop poly fabrics with a waterproof coating (at least 1500–3000mm hydrostatic head in mid-range gear) and a tethered or integrated groundsheet to reduce wind lift and ground moisture ingress.
Step-by-step setup for extra living space (how to set up a tent annex for extra living space)
- Step 1: Position the annex so doorways align with the main tent and shield openings from prevailing wind.
- Step 2: Attach the annex to the main tent at the shared door seam or via compatible connectors.
- Step 3: Stake down all four corners, then secure guy lines to stabilize against gusts.
- Step 4: Unfold the groundsheet, smooth wrinkles, and tether it to the tent’s frame or pegs.
- Step 5: Run a seam sealer over any critical joints and use a rainfly extension if heavy rain is expected.
- Step 6: Place mats, dividers, or storage organizers to create an organized living zone.
Choosing between a tent vestibule and a dedicated annex room
Vestibules save weight and keep entryways organized; annex rooms maximize living space.
Vestibules create a light, quick-access buffer and are ideal when you want to preserve packing weight and keep gear separate from living spaces.
Consider door placement, ceiling height, and whether you need enclosed space.
For family camping, aim for an annex room with door access that aligns with your main tent, a usable ceiling height (ideally around 1.85–2.0 m), and a layout that supports slow evenings inside when weather turns.
How a tent annex compares to other shelter options
A camping canopy or tent awning is lighter but may offer less protection and privacy.
Canopies provide shade and extra shelter but lack enclosed rooms and may require extra poles and guy lines.
An annex room provides interior living space but adds setup complexity.
An annex room delivers true interior space for lounging, dining, or storage, at the cost of more assembly time and additional anchors.
Transitioning between options hinges on your sizing, dimensions, and setup needs for real campsites. Next, sizing, dimensions, and setup for real campsites will ensure you choose a tent annex configuration that fits your family and gear.
Sizing, dimensions, and setup for real campsites
A well-chosen tent annex expands living space without expanding your pack. Start with the footprint, door alignment, and how you’ll attach it to your base tent. Whether you’re turning a three-person tent into a roomy family setup or simply adding dry storage, precise sizing keeps previously tight campsites comfortable and navigable.
Tent annex dimensions for a three person tent
- #### Typical footprints range from about 1.6–3.0 m wide and 2.5–3.5 m deep, varying by model and door arrangement.
- #### Always measure your base tent’s width and door alignment before buying. If the annex door lines up with a corner seam or a packed strap, you’ll gain easier access and less crowding.
- #### Factor door configuration: one versus two doors, central versus side access, and how you’ll use the space (sleeping alcove, living area, or storage) to pick the best width and depth.
- #### Check floor compatibility and groundsheet style. Some options assume a compatible tent floor; if your base lacks a full floor, look for vestibule or attachable-floor variants.
Best tent annex for family camping and storage
- #### Choose models with multiple rooms or generous vestibule space to separate living and gear. A dedicated sleeping alcove plus a main living area helps kids nap without disturbing the adults.
- #### Prioritize waterproof rating, seams, and floor compatibility. Look for a high hydrostatic head (waterproof rating) and fully taped seams to handle rain without seepage.
- #### Consider ventilation and screen panels. Mesh doors and windows reduce condensation while keeping bugs out.
- #### Look for practical layouts: internal dividers, multiple access points, and gear lofts or pockets. These features turn a tent annex into separate living and storage zones, or a true annex room for gear, chilly boots, and extras like cooking gear under a dry canopy.
Planning space: living area versus storage needs
- #### Estimate occupants, gear, and cooking area to define the annex footprint. If you cook outside, you’ll want a larger vestibule for a dry dining zone; if you’re maximizing sleep space, prioritize a compact, sheltered living area.
- #### Decide if you want a sleeping alcove, a dining area, or simply more dry storage. A sleeping nook reduces tent crowding, while a wide vestibule can host a folding table and chairs.
- #### Consider movement space and weather risk. Allow clear paths around doors and stoves, plus extra room for entering and exiting in rain.
- #### For rainy trips, a dedicated dry zone in the annex becomes invaluable, acting as mud-free gear storage and a protective entrance.
That groundwork sets you up for weatherproofing, attachment, and real-world setup.
Weatherproofing, attachment, and real-world setup
A tent annex adds valuable living space to a family or solo setup, turning a simple campsite into a more comfortable zone for cooking, storage, or lounging. Choosing the right annex, ensuring solid attachment, and preparing for wet weather keeps the interior dry and the footprint stable across varied campsites. The goal is a seamless extension that feels like a natural part of your tent rather than an add-on.
How to attach a tent annex to an existing tent
Use compatible attachment points, levels, and guidelines from the tent manufacturer.
Match your tent annex to the existing tent’s door or vestibule system, looking for shared zipper tracks, anchor points, and compatible poles. When possible, select an annex with integrated groundsheet and a matching doorway to minimize gaps. A well-fitted tent annex becomes a true tent extension, effectively creating an annex room that behaves like an extra living space.
Seal seams and secure pegs; ensure there is overlap to prevent gaps.
Apply seam sealer to any external seams and use pegging pattern recommendations to maintain tension. Leave an overlap between the annex and tent walls to block wind-driven rain and dust from entering. Place a secondary guylines system on exposed sides, especially in gusty campsites, to keep the attachment flat and predictable.
Practical steps and checks
Lay the annex on a flat surface, align door zips with the original tent door, and connect via the manufacturer’s channels. Stake every corner, run tensioned guy lines, and verify fabric is taut without distortion. Perform a light water test by misting the seam lines to confirm no leaks before sleeping inside the annex room.
Waterproof tent annex options for rainy camping trips
Look for sealed seams, waterproof fabrics, and robust zippers.
Prioritize tent annexes with factory-sealed seams, 1500–3000 mm hydrostatic head fabrics, and YKK-style waterproof zippers. A dry interior is more important than a flashy big footprint when storms roll in.
Consider a full-coverage rainfly and compatible groundsheet for dry interiors.
A rainfly that covers the annex roof and sides, paired with a tailored groundsheet, minimizes splashback and ground dampness. If a full-coverage rainfly isn’t available, add a lightweight tarp or canopy extension to direct runoff away from the living area.
Weatherproofing in practice
For a family setup, opt for a tent annex with dimensions around 240 cm by 180 cm to create a dedicated living or storage area. Test-in-the-wet in a controlled setting by setting up in drizzle and verifying interior dryness after a 2-hour exposure.
Tips for integrating a tent awning or camping canopy with an annex
Match anchors and heights to minimize wind entry and maximize shade.
Align canopy poles with existing tent poles where possible, keeping canopy edge slopes away from the door to reduce wind funneling toward the entrance. Use compatible hooks or connectors so the canopy shares the same anchor system as the annex.
Use a canopy as an air-door extension to reduce mud and airflow concerns.
Position the canopy to create a protected transition zone between outside and the annex room. The air-door effect helps minimize mud tracking and keeps cold air from reaching sleeping or seating areas.
Real-world setup example
A family with a three-person tent attaches a compact camping canopy to the annex side, creating a sheltered mudroom. The canopy anchors to both the tent and two independent stakes, with the canopy roof slightly higher than the tent entrance to redirect wind. This setup preserves airflow while maintaining a clean, dry interior.
Tent annex FAQ
A tent annex adds dedicated living space, gear storage, and shelter from drizzle, turning a simple tent into a versatile camp setup. It functions as a tent extension that can connect to your doorway, effectively creating a larger vestibule or a separate tent room. Choose options that align with weather, size, and compatibility with your existing tent.
How to set up a tent annex for extra living space
Start by confirming compatibility with your tent’s door and connectors, then lay a footprint or groundsheet to protect the floor. Position the annex for level ground and drainage, and attach it to the tent door or via poles to form a sturdy tent vestibule. Stake the corners and tension the guy lines to keep wind out. Inside, create a comfortable living zone with a small rug, compact chairs, and a chest for essentials. For a three-person tent, plan an annex depth of about 2–3 meters and a width equal to or larger than the tent to feel roomy. Ventilation is key—open vents or create cross-flow between the tent and annex. If rain is forecast, use a camping canopy or tent awning extension to shield entrances and reduce runoff at the doorway.
What is the best tent annex for family camping and storage
Families benefit from a larger footprint, two doors, and a divide between living space and storage. Look for annexes that offer an inner room or removable panels to create a dedicated kids’ area, plus a robust groundsheet and durable fabric. Typical good options range from 8×6 ft to 10×8 ft, with reinforced seams and easy attachment to common family tents. A camping canopy-style extension can provide extra shade and rain protection without overloading the core tent.
How to choose waterproof tent annex options
Prioritize waterproof performance: seek a hydrostatic head of 1500–3000 mm, taped seams, and a bathtub floor to seal out moisture. Choose fabrics with robust UV resistance and reinforced zippers. Ensure the annex includes a proper rainfly or canopy that shields the doorway and a design that sheds water away from the zipper line. Also consider weight, pack size, and how quickly you can set up and take down in wet conditions; a quick-connect attachment to your tent speeds rainy trips.
Conclusion and practical takeaways
A well-chosen tent annex transforms a compact main tent into a more versatile shelter, giving you extra living space, storage, and a protected transition zone between indoors and the campsite. When sizing, waterproofing, and attachment are handled correctly, the annex feels like a natural extension rather than an add-on.
Key takeaways
Proper sizing and layout
A tent annex should complement your tent footprint while providing a comfortable living area. Start with the tent’s width and door position, then add depth to create a dry vestibule or an extra annex room. For a family-friendly setup, a 2.0–3.0 m depth often delivers usable space without overburdening the campsite.
Waterproofing, ventilation, and materials
Prioritize a robust waterproof canopy (aim for at least 1500–3000 mm hydrostatic head), taped seams, and a durable floor. A tent vestibule or annex room benefits from breathable materials and mesh panels to reduce condensation. Good ventilation keeps air circulating, especially when you’re cooking inside or near the doorway.
Attachment compatibility and ease of setup
Choose annexes that attach cleanly to your existing tent via compatible clips, sleeves, or awning connectors. A quick-attach system and aligned zippers save setup time, particularly on rainy or windy days. If you already have a tent awning or camping canopy, verify that the annex can share hardware or adapt to similar pole styles.
Decision guide and quick-start checklist
Assess family size, gear, and climate
Match annex size to your needs: sleeping space for kids, gear storage, and an area for cooking or lounging. In wet climates or muddy camps, favor a larger tent extension so boots and packs stay outside the sleeping zone. For a three-person tent, a modest 2.0–3.0 m extension can become a useful tent vestibule or extra room without overcrowding.
Test setup at home or backyard before a trip and pack essential tools
Always trial the setup before departure: align doors, test zipper movement, and verify that all attachment points engage with your tent. Pack a compact tools kit: spare stakes, guy-line tensioners, duct tape, seam sealer, spare patches, and a small mallet. Practicing in a safe space minimizes surprises at the site.
Maintenance, care, and future upgrades
Clean and dry before storage; inspect seams and zippers after trips
Post-trip care matters. Clean away dirt, dry the fabric completely, and reproof fabric if water resistance wanes. Inspect seams, zipper tracks, and attachment points for wear; reseal seams as needed and replace worn zippers or clips to maintain performance.
Consider modular designs that enable easy expansion or replacement
Opt for modular designs that let you add or remove sections as seasons change. A modular tent annex can function as extra living space, a larger camping canopy, or a compact tent awning, and you can upgrade fabrics or connectors over time without replacing the entire system.